
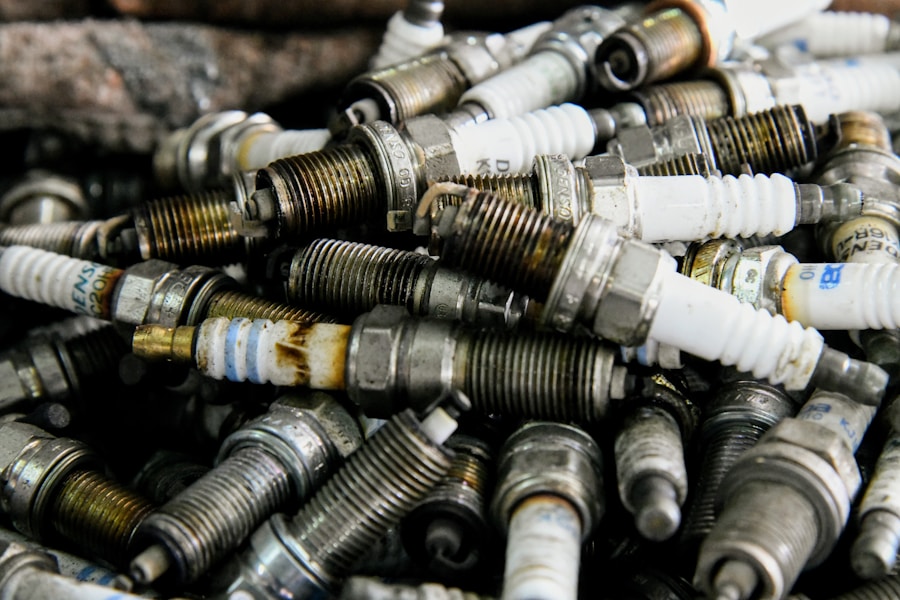

For owners of a 2007 Lexus ES 350, maintaining optimal engine performance is a common consideration. A key component in this process is the spark plug. This article provides a detailed guide on how to replace the spark plugs in your 2007 Lexus ES 350, focusing on the procedural steps and necessary precautions.
Understanding Spark Plugs and Their Function
Spark plugs are vital components in an internal combustion engine, initiating the combustion process within each cylinder. They deliver an electrical spark to ignite the air-fuel mixture, generating the power required for the engine to operate. Their effective functioning is directly linked to engine performance, fuel efficiency, and emissions.
Spark Plug Anatomy
A typical spark plug consists of several parts:
- Terminal: Connects to the ignition coil via a spark plug wire or coil-on-plug boot.
- Insulator: Made of ceramic, it electrically insulates the center electrode and withstands high temperatures and voltages.
- Ribs: Located on the insulator, they prevent flashover, which is when the electrical charge travels along the insulator surface instead of jumping the gap.
- Insulator Tip: Protects the center electrode and regulates its temperature.
- Center Electrode: Typically made of a nickel alloy, platinum, or iridium, it conducts electricity to the spark gap.
- Side/Ground Electrode: Welded to the metal shell, it completes the spark gap with the center electrode.
- Metal Shell: Threads into the cylinder head, grounding the spark plug and dissipating heat.
Symptoms of Failing Spark Plugs
Over time, spark plugs degrade due to constant exposure to high temperatures and electrical discharges. This degradation manifests in several ways:
- Engine Misfires: A primary indicator, felt as a stutter or hesitation during acceleration.
- Reduced Fuel Economy: Worn plugs lead to incomplete combustion, requiring more fuel for the same power output.
- Rough Idling: The engine may shake or vibrate excessively when stationary.
- Difficulty Starting: A weak spark can make the engine harder to crank over.
- Check Engine Light: The vehicle’s onboard diagnostic system may trigger a warning light due to misfires.
- Reduced Acceleration: The engine may feel less responsive or sluggish when accelerating.
- Increased Emissions: Inefficient combustion can lead to higher levels of pollutants in the exhaust.
Recommended Replacement Interval

For the 2007 Lexus ES 350, equipped with the 2GR-FE 3.5L V6 engine, manufacturers generally recommend spark plug replacement at intervals of approximately 100,000 to 120,000 miles. Adhering to this schedule is crucial for maintaining engine health and efficiency. However, driving conditions and fuel quality can influence the actual lifespan of the plugs, necessitating earlier replacement in some cases.
Essential Tools and Materials
Before beginning the spark plug replacement procedure, gather all necessary tools and materials. This preparation streamlines the process and ensures an efficient workflow.
Required Tools
- Socket Wrench (3/8-inch drive recommended): For general tightening and loosening of fasteners.
- Spark Plug Socket (14mm or 16mm, depending on plug type): Specifically designed to grip spark plugs without damaging the porcelain insulator. Ensure it has a rubber insert to hold the plug.
- Extensions (various lengths): Necessary for reaching deeply recessed spark plugs, particularly on the rear bank.
- Swivel Joint/Universal Joint: Helps maneuver the socket in tight or angled spaces.
- Torque Wrench: Crucial for tightening spark plugs to the manufacturer’s specified torque, preventing overtightening or undertightening.
- Flathead Screwdriver: For prying tabs or disconnecting electrical connectors.
- Pliers (needle-nose or general purpose): For gripping and manipulating small components or hoses.
- Ratcheting Wrench (optional): Can provide better access in confined areas.
- Compressed Air: For cleaning debris from around the spark plug wells before removal.
- Dielectric Grease: Applied to the inside of spark plug boots to prevent moisture intrusion and facilitate future removal.
- Anti-Seize Compound: Applied to spark plug threads to prevent seizing in the cylinder head. Note: Some spark plug manufacturers pre-apply a coating, so check instructions.
- New Spark Plugs: Six iridium-tipped spark plugs, specifically designed for the 2007 Lexus ES 350 (e.g., Denso FK20HR11 or NGK IFR6A11). Confirm compatibility with your vehicle’s engine.
Safety Precautions
Working on an engine involves potential hazards. Adhere to these safety precautions:
- Engine Off and Cool: Never work on a hot engine. Allow sufficient time for the engine to cool down completely to prevent burns and allow components to be handled.
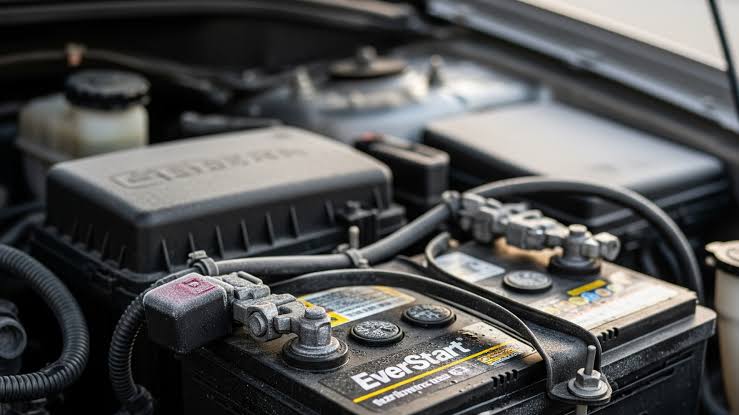
- Disconnect Battery: Disconnect the negative terminal of the vehicle’s 12V battery. This prevents accidental shorts and protects the vehicle’s electrical system while working with ignition system components.
- Wear Personal Protective Equipment (PPE):
- Safety Glasses: Protect eyes from debris.
- Gloves: Protect hands from cuts, scrapes, and chemicals.
- Adequate Lighting: Ensure the work area is well-lit for visibility.
- Stable Working Surface: If lifting the vehicle for any reason, ensure it is securely supported by jack stands. (However, lifting is generally not required for spark plug replacement).
Accessing the Spark Plugs
The 2007 Lexus ES 350, with its V6 engine, presents a two-bank configuration. Accessing all spark plugs requires removing several components. Patience and methodical dismantling are key.
Passenger Side (Front Bank) Spark Plugs
The spark plugs on the front bank (closest to the radiator) are generally more accessible.
- Engine Cover Removal: The engine’s plastic decorative cover obstructs access. Typically, this cover is held in place by a few retaining clips or bolts. Carefully detach these and lift the cover off.
- Ignition Coil Identification: Locate the three ignition coils on the passenger side. Each coil sits directly atop a spark plug.
- Electrical Connector Disconnection: Each ignition coil has an electrical connector. Press the release tab on the connector and gently pull it straight off. Avoid pulling on the wires themselves.
- Ignition Coil Bolt Removal: Each ignition coil is typically secured by a single 10mm bolt. Use your socket wrench to remove these bolts.
- Coil Removal: Once the bolt is removed and the electrical connector disconnected, carefully pull the ignition coil straight up and out of its well. Exercise caution to avoid damaging the coil or the spark plug boot.
- Debris Clearing: Before removing the spark plugs, use compressed air to blow any debris (dirt, dust, leaves) from the spark plug wells. This prevents contaminants from falling into the combustion chamber once the old plug is removed.
Driver Side (Rear Bank) Spark Plugs
The rear bank, situated closer to the firewall, requires additional component removal for adequate access. This is often the more challenging part of the procedure.
- Air Intake Hose Removal: Start by disconnecting the mass airflow sensor (MAF sensor) electrical connector. Loosen the clamps securing the air intake hose to the throttle body and the air filter housing. Carefully detach the hose.
- Air Filter Housing Removal (Optional but Recommended): While sometimes possible to work around, removing the air filter housing provides significantly more space. This generally involves unclipping the top of the housing, removing the filter, and then unbolting the base from its mounting points.
- Throttle Body Removal (Advanced/Optional): In some cases, particularly for larger hands or limited tooling, removing the throttle body can create more room. This involves disconnecting electrical connectors and coolant lines (if present) and unbolting it from the intake manifold. Note: If removing the throttle body, ensure proper reinstallation and consult a service manual for torque specifications and gasket replacement.
- Upper Intake Manifold Removal: This is often the most significant step for accessing the rear bank.
- Disconnect Vacuum Lines and Electrical Connectors: Carefully identify and disconnect all vacuum hoses and electrical connectors attached to the upper intake manifold. Use a flathead screwdriver or pliers as needed.
- Fuel Line Disconnection (if necessary): Some manifold designs may require detaching fuel lines. If so, ensure you relieve fuel pressure beforehand and have appropriate fuel line disconnect tools and rags available to catch any spills. Note: The 2007 Lexus ES 350 generally does not require fuel line disconnection for manifold removal in this context, but always verify.
- Manifold Retaining Bolts/Nuts: Locate and remove all bolts or nuts securing the upper intake manifold to the lower intake manifold. These are typically 10mm or 12mm. Keep track of their locations for reassembly.
- Careful Lifting: Once all fasteners are removed and connections disconnected, gently lift the upper intake manifold off the engine. Be mindful of gaskets underneath; they may stick. Place the manifold in a safe, clean location.
- Accessing Ignition Coils (Rear Bank): With the intake manifold removed, the three ignition coils on the rear bank become visible. Follow the same steps as for the front bank to disconnect electrical connectors, remove retaining bolts, and extract the coils.
- Debris Clearing: As with the front bank, use compressed air to clear debris from the spark plug wells before proceeding to actual plug removal. This step is critical to prevent foreign matter from entering the cylinders.
Spark Plug Removal and Installation
This section details the critical steps for removing the old spark plugs and installing the new ones. Accuracy and adherence to torque specifications are paramount.
Removing Old Spark Plugs
- Insert Spark Plug Socket: Carefully insert the spark plug socket into the well, ensuring it fully engages with the hexagonal head of the spark plug. Use extensions and a universal joint as needed to navigate angles.
- Loosen Spark Plug: Attach your ratchet to the extension and turn counter-clockwise to loosen the spark plug. The initial break-loose may require firm, steady pressure. If the plug feels excessively tight, consider applying a small amount of penetrating oil around the spark plug base and allowing it to soak, though this is rarely necessary for modern plugs.
- Metaphor: Think of the spark plug as a deeply rooted tree. You’re gently twisting it free from its soil, carefully applying leverage to avoid stressing the fragile trunk (the porcelain insulator).
- Extract Spark Plug: Once loosened, continue turning counter-clockwise by hand if possible, or with the ratchet, until the spark plug is free. The rubber insert in the spark plug socket will help hold the plug as you withdraw it from the well.
- Inspect Old Spark Plugs: Examine the removed spark plugs. Their condition can offer insights into the engine’s health:
- Light Tan/Gray Residue: Ideal condition, indicating efficient combustion.
- Black/Sooty: Suggests a rich fuel mixture (too much fuel, not enough air) or prolonged idling.
- Oil-Fouled: Indicates oil leaking into the combustion chamber, possibly from worn valve guides or piston rings.
- Ash Deposits: Can be from fuel or oil additives.
- Melted/Blistered Electrodes: Severe overheating, often due to pre-ignition or an overly lean fuel mixture.
Installing New Spark Plugs
- Gap Verification (if applicable): Most modern iridium-tipped spark plugs (“long-life” or “pre-gapped”) come pre-gapped from the factory and should not be adjusted unless specifically stated or there is clear evidence of damage. Consult the manufacturer’s specifications for the correct gap (e.g., 0.043 inches or 1.1mm for the Denso FK20HR11). For traditional copper or platinum plugs, use a spark plug gapping tool to adjust the gap. Improper gapping can cause misfires or damage.
- Apply Anti-Seize (Optional): If the new spark plugs do not have a silver-colored coating on the threads, apply a small amount of anti-seize compound to the threads. Too much can act as an insulator and interfere with grounding. Modern spark plugs often have a special coating and do not require anti-seize; consult the manufacturer’s instructions.
- Thread New Spark Plug by Hand: Carefully insert the new spark plug into the spark plug socket. Lower the socket into the spark plug well and begin to thread the plug in by hand. This is a critical step to prevent cross-threading the cylinder head. Metaphor: Treat the threads as a delicate zipper. You want to align them perfectly before applying any force, ensuring a smooth, undamaged engagement. If you feel resistance, stop, withdraw, and re-attempt.
- Tighten to Snug: Once you’ve threaded the plug in by hand as far as it will go, use your socket wrench to gently tighten it to a snug position. Do not apply excessive force at this stage.
- Torque Spark Plugs: This is arguably the most important step. Use a torque wrench to tighten each spark plug to the manufacturer’s specified torque. For the 2007 Lexus ES 350’s 2GR-FE engine, the typical spark plug torque specification is around 13 lb-ft (18 Nm). Overtightening can strip cylinder head threads or crack the spark plug’s insulator. Undertightening can lead to compression leaks, misfires, or the plug backing out.
- Metaphor: The torque wrench is your instrument for precision. You’re not just tightening a bolt; you’re securing a critical component to a specific tension, ensuring it performs optimally without being overstressed.
- Install Ignition Coils:
- Apply Dielectric Grease: Apply a thin layer of dielectric grease to the inside of the spark plug boot of each ignition coil. This helps seal out moisture and prevents the boot from sticking to the spark plug, making future removal easier.
- Push Coil Down: Carefully push each ignition coil straight down over its respective spark plug until it is fully seated. You should feel it “click” into place.
- Reinstall Coil Bolt: Secure each ignition coil with its 10 mm retaining bolt, tightening it snug (typically around 7-8 lb-ft or 9-11 Nm, but verify if concerned).
- Reconnect Electrical Connector: Reconnect the electrical connector to each ignition coil, ensuring it clicks securely.
Reassembly and Testing
With the new spark plugs in place, the remaining steps involve reassembling the engine components and performing a functional check.
Rear Bank Reassembly
- Upper Intake Manifold Reinstallation:
- Gasket Inspection: Inspect the intake manifold gaskets (often rubber or composite seals). If they are visibly damaged, cracked, or hardened, replace them. Otherwise, ensure they are clean and properly seated.
- Position Manifold: Carefully lower the upper intake manifold back onto the lower intake manifold, aligning it precisely.
- Install Bolts/Nuts: Reinstall all retaining bolts and nuts for the intake manifold. Tighten them in the specified sequence (refer to a service manual if available, though a star pattern from the center outwards is a common approach) to the correct torque specification. Metaphor: The intake manifold is like a puzzle piece; it needs to fit perfectly, and all its fasteners contribute to its structural integrity.
- Reconnect Vacuum Lines and Electrical Connectors: Reattach all vacuum hoses and electrical connectors that were disconnected from the intake manifold, ensuring each is securely fastened to its original location. Double-check for any missed connections.
- Air Filter Housing and Intake Hose Reinstallation: Reinstall the air filter housing (if removed), ensuring it is securely bolted. Reattach the air intake hose to the throttle body and air filter housing, tightening the clamps. Reconnect the MAF sensor electrical connector.
Front Bank Reassembly
- Engine Cover Reinstallation: Place the engine’s plastic decorative cover back into position, securing any clips or bolts.
Final Checks and Startup
- Reconnect Battery: Reconnect the negative terminal of the 12V battery.
- Visual Inspection: Perform a final visual inspection of the engine bay. Ensure all tools are accounted for, all hoses are connected, all electrical connectors are secured, and no visible wires are frayed or damaged.
- Start Engine: Start the engine. Listen for any unusual noises, such as misfires, knocking, or vacuum leaks. The engine should idle smoothly. Allow it to run for a few minutes.
- Test Drive: Take the vehicle for a short test drive. Pay attention to acceleration, idle quality, and any warning lights on the dashboard. If the “Check Engine” light was on due to spark plug-related misfires, it should extinguish after a few drive cycles, or you may need to clear the codes with an OBD-II scanner.
Troubleshooting Common Issues
Despite careful adherence to procedure, issues can sometimes arise. Knowing how to diagnose them can save time and effort.
Engine Misfire After Replacement
- Loose Electrical Connector: Check that all ignition coil electrical connectors are fully seated and clicked into place.
- Loose Coil Bolt: Ensure ignition coil retaining bolts are snug.
- Damaged Spark Plug Wire/Boot: Inspect the spark plug boot for cracks or tears. Even a small imperfection can cause a misfire.
- Cross-Threaded Spark Plug: While rare if threaded by hand, a cross-threaded plug can lead to compression loss and misfires. This requires professional intervention.
- Damaged Spark Plug: Accidental drops or rough handling can damage the porcelain insulator or electrodes.
- Incorrect Spark Plug Gap: Verify the gap on all plugs if you adjusted them manually. Even pre-gapped plugs can be damaged during shipping.
Vacuum Leaks
- Loose Intake Manifold Bolts: Recheck all intake manifold bolts, ensuring they are tightened to specification.
- Damaged Gaskets: If intake manifold gaskets were not replaced and were old, they might have developed new leaks upon reassembly.
- Disconnected Vacuum Hoses: Double-check all vacuum lines that were disconnected, ensuring they are securely reattached and not cracked or split.
The check engine light persists
- Misfire Codes: Use an OBD-II scanner to read any stored diagnostic trouble codes (DTCs). If misfire codes (P030X) are present, it pinpoints the cylinder(s) experiencing issues.
- Other Related Issues: While less common directly after spark plug maintenance, the check engine light could be triggered by unrelated issues. Confirm the codes are indeed spark plug or ignition system-related before further investigation.
Conclusion
Replacing the spark plugs in a 2007 Lexus ES 350, particularly the rear bank, requires a methodical approach and attention to detail. By following this guide, you can improve engine performance, restore fuel efficiency, and prolong the life of your vehicle’s ignition system. This procedure, while requiring a degree of mechanical aptitude, is achievable for a detailed do-it-yourself enthusiast.




Leave a Reply