

This article provides a step-by-step guide to replacing your car’s radiator coolant. Performing this maintenance task can help ensure your vehicle’s cooling system operates efficiently, preventing overheating and extending the lifespan of critical engine components.
Understanding Your Vehicle’s Cooling System
The cooling system is the unsung hero of your car’s engine. It acts as the body’s circulatory system, regulating the engine’s temperature. Just as your body needs a stable internal temperature to function optimally, so too does an internal combustion engine. Excessive heat can lead to significant damage, causing components to warp, seize, or fail.
The Role of Radiator Coolant
Radiator coolant, also known as antifreeze, is a fluid specifically designed to manage engine temperature. It circulates through the engine block, absorbing excess heat generated during combustion. This heat is then transferred to the surrounding air as the coolant passes through the radiator. Coolant also possesses critical properties that go beyond simple heat absorption:
Antifreeze Properties
In colder climates, coolant prevents the water within the cooling system from freezing. Water expands when it freezes, and this expansion can exert immense pressure, capable of cracking the engine block or radiator. The antifreeze component of the coolant lowers the freezing point of the mixture, safeguarding the system in sub-zero temperatures.
Anti-Boiling Properties
Conversely, in warmer climates or under heavy engine load, coolant prevents the water from boiling. Boiling creates steam, which does not transfer heat as effectively as liquid coolant and can lead to the formation of air pockets within the system, diminishing its cooling capacity. The anti-boiling additive raises the boiling point of the mixture, ensuring it remains in liquid form.
Corrosion Inhibition
Engine cooling systems are comprised of various metals, including aluminum, iron, and copper. These metals are susceptible to corrosion, especially when exposed to water and fluctuating temperatures. Coolant contains corrosion inhibitors that form a protective layer on these metal surfaces, preventing rust and degradation. Over time, these inhibitors deplete, making coolant replacement a crucial preventative measure.
Lubrication
Certain components within the cooling system, such as the water pump, rely on the circulating coolant for lubrication. The viscosity of the coolant helps to reduce friction and wear on these moving parts, contributing to their longevity.
Signs of Failing Coolant
The effectiveness of your coolant diminishes over time due to a variety of factors including the breakdown of additives, contamination, and natural degradation. Recognizing these signs can help you address problems before they escalate.
Visible Deterioration
Old coolant can become discolored, appearing rusty, murky, or having a slimy consistency. You might also observe sediment or sludge at the bottom of the coolant reservoir. This indicates a breakdown of the corrosion inhibitors and potential buildup within the system.
Overheating Episodes
If your car’s temperature gauge consistently creeps into the red zone, or if you experience sudden overheating, it’s a strong indicator that the coolant is no longer effectively regulating temperature. This can be due to low coolant levels, a blocked radiator, or degraded coolant properties.
Pungent Odors
A sweet or acrid smell emanating from your engine bay, particularly when the engine is hot, can signal a coolant leak. This odor is often associated with the burning of coolant that has escaped onto hot engine components or exhaust manifolds.
Rust or Scale in the Reservoir
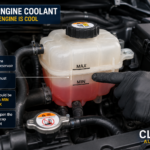
The coolant reservoir (often a translucent plastic tank) can sometimes reveal visual clues to the coolant’s condition. The presence of rust-colored deposits or white, flaky scale suggests that the coolant’s protective properties have degraded, leading to corrosion within the system.
Preparing for the Coolant Replacement
Proper preparation is key to a smooth and safe coolant replacement. Gathering the necessary tools and materials beforehand will streamline the process and minimize the risk of injury or damage.
Essential Tools and Materials

To undertake this task, you will need a selection of common automotive tools. Having these readily available will prevent interruptions and ensure you have everything required at the critical stages.
Safety Gear
Personal safety is paramount. Always wear appropriate safety gear to protect yourself from hot fluids and potential chemical exposure.
- Safety Glasses or Goggles: To protect your eyes from splashes.
- Chemical-Resistant Gloves: To prevent skin contact with coolant, which can be irritant or toxic.
- Long-Sleeved Shirt and Pants: To protect your skin from spills and heat.
Draining and Filling Tools
These tools will facilitate the removal of old coolant and the introduction of new coolant.
- Drain Pan: A specifically designed pan with a sufficient capacity to catch all the old coolant. Ensure it can accommodate at least 5-7 gallons, as the entire system needs to be drained.
- Wrench Set or Socket Set: To loosen and remove the radiator drain plug or lower radiator hose clamp. The size will vary by vehicle.
- Pliers: For manipulating hose clamps.
- Funnel: A clean funnel, preferably with a wide mouth, is essential for adding new coolant without spills.
- Container for Old Coolant: A sealable container for transporting used coolant to a recycling facility.
Coolant and Related Supplies
The quality and type of coolant are critical. Using the wrong type can cause significant damage.
- New Radiator Coolant: Consult your vehicle’s owner’s manual to determine the correct type and color of coolant (e.g., conventional green, extended-life orange, HOAT, OAT). Mixing incompatible types can create a gel-like substance that clogs the system. Most modern vehicles use a 50/50 pre-mixed solution, but some may require concentrate that you mix with distilled water.
- Distilled Water: If using coolant concentrate, distilled water is essential. Tap water contains minerals that can cause scale buildup and corrosion within the cooling system.
- Rags and Paper Towels: For cleaning up spills.
- Optional: Radiator Flush Kit: If your system is particularly dirty, a radiator flush kit can be beneficial. This often involves a cleaning solution and a temporary flushing device.
Choosing the Right Coolant
Selecting the correct coolant is not a matter of preference; it’s a critical mechanical decision. The components and chemistry of your engine’s cooling system are designed to work with specific coolant formulations.
Understanding Coolant Types
Automotive coolants have evolved over the years, with different chemistries offering varying levels of protection and lifespan. Modern vehicles often utilize Extended Life Coolants (ELCs) which significantly outlast traditional coolants.
- IAT (Inorganic Additive Technology): These are the older, conventional green coolants. They rely on silicates and phosphates for corrosion protection. They typically have a shorter service life (around 2 years or 30,000 miles).
- OAT (Organic Acid Technology): These are often orange or red and do not contain silicates or phosphates. They offer longer service intervals (around 5 years or 100,000 miles).
- HOAT (Hybrid Organic Acid Technology): These are a blend of IAT and OAT, commonly found in many modern vehicles and often colored yellow or orange. They aim to combine the rapid protection of IAT with the extended life of OAT.
Checking Your Owner’s Manual
Your vehicle’s owner’s manual is the definitive source for coolant specifications. It will specify the exact type, color, and mixture ratio (if applicable) required for your make and model. Using the wrong type can lead to premature corrosion, blockage, and even component failure. If you cannot locate your owner’s manual, a reputable auto parts store or dealership can assist you in identifying the correct coolant.
The Step-by-Step Coolant Replacement Process
This section details the procedure for draining, flushing (if necessary), and refilling your car’s cooling system. It is advisable to perform this task when the engine is completely cool.
Draining the Old Coolant
The first step is to safely remove the old coolant from the system. This ensures that all the degraded fluid is expelled, allowing fresh coolant to circulate effectively.
Positioning Your Vehicle
Ensure your vehicle is parked on a level surface. This allows for complete draining and accurate refilling. If your vehicle has a front-end lift or ramps, use them to gain better access to the radiator drain plug or lower hose. Never work under a vehicle supported only by a jack. Always use jack stands.
Locating the Radiator Drain Plug or Lower Radiator Hose
Most radiators have a drain plug located at the bottom. This is a small plastic or metal valve that can be opened to allow the coolant to drain. If your radiator does not have a drain plug, or if it is inaccessible, the alternative is to disconnect the lower radiator hose. This hose connects the radiator to the water pump.
Draining the Coolant
- Place the Drain Pan: Position the drain pan directly beneath the radiator drain plug or the lower radiator hose.
- Open the Radiator Cap (with caution): Ensure the engine is completely cool. Slowly and carefully open the radiator cap. You may hear a slight hiss as residual pressure is released. This will allow coolant to flow more freely.
- Open the Drain Plug or Loosen the Hose Clamp:
- If using the drain plug: Use the appropriate wrench or socket to carefully loosen and remove the drain plug. Be prepared for the coolant to flow out immediately.
- If disconnecting the lower hose: Use pliers to loosen the hose clamp securing the lower radiator hose to the radiator neck. Once loosened, gently twist and pull the hose off the radiator. Be ready for a surge of coolant.
- Allow Complete Drainage: Let the coolant drain completely into the pan. This may take several minutes.
Flushing the Cooling System (Optional but Recommended)
If your coolant was particularly dirty or if you’re switching to a different type of coolant, flushing the system can remove residual contaminants.
Using a Radiator Flush Product
Many automotive parts stores sell radiator flush products. These typically involve adding a cleaning solution to the cooling system, running the engine for a specified period, and then draining it again.
- Add Flush Solution: Once the old coolant has been drained, close the drain plug or reattach the lower radiator hose. Follow the instructions on the flush product for the correct amount to add to the system.
- Fill with Distilled Water: Fill the cooling system with distilled water to the designated fill line.
- Run the Engine: Start the engine and let it run for the time specified by the flush product’s instructions (typically 10-15 minutes), with the heater set to high. This circulates the cleaning solution throughout the system. Be careful not to let the engine overheat during this process.
- Drain Again: Once the engine has cooled, drain the system thoroughly once more. You may need to repeat this process a couple of times if the drained water is still significantly discolored.
Refilling with New Coolant
The refilling process is crucial for ensuring the cooling system is properly filled and bled of air. Trapped air can create hot spots and impair cooling efficiency.
Preparing for Refill
- Close the Drain Plug or Reattach the Hose: Ensure the radiator drain plug is securely tightened, or the lower radiator hose is reconnected and the hose clamp is tightened.
- Open the Radiator Cap: Remove the radiator cap to allow for filling.
Adding New Coolant
- Initial Fill: Using a clean funnel, slowly pour the new coolant mixture into the radiator until it reaches the fill line. If you are using a 50/50 pre-mixed solution, this is ready to use. If you are using concentrate, mix it with distilled water in a separate container according to the manufacturer’s instructions before pouring it into the radiator. A 50/50 ratio is common for most climates, but consult your owner’s manual for specifics.
- Fill the Coolant Reservoir: Most vehicles have a separate coolant reservoir (overflow tank). Fill this reservoir to the specified “cold” fill line.
- Bleeding the System (Crucial Step): This is a vital step to remove air pockets.
- Engage the Heater: Turn your car’s heater to its highest setting and the fan to low. This opens the heater core, which is a small radiator for the cabin, allowing coolant to circulate through it and air to escape.
- Run the Engine: Start the engine and let it run. As the engine warms up, the coolant will expand, and air bubbles will begin to rise towards the radiator cap.
- Top Off: As you see bubbles emerging from the radiator fill neck, continue to slowly add coolant to maintain the fill level. You may need to top off the reservoir as well.
- Observe Temperature Gauge: Monitor the engine temperature gauge. Once it reaches its normal operating temperature and the thermostat opens (you will often hear a clunk or notice the upper radiator hose get warm), the majority of the air should have been expelled.
- Replace Radiator Cap: Once you no longer see significant bubbling and the engine is at operating temperature, carefully replace the radiator cap.
Post-Replacement Checks and Maintenance
After refilling the system, several checks are necessary to ensure the job was done correctly and to maintain the cooling system’s performance.
Checking for Leaks
Leak detection is a critical final step before considering the job complete. Even a small leak can lead to significant coolant loss and potential overheating.
Visual Inspection
- After Initial Run: After running the engine and bleeding the system, visually inspect all connections, hoses, the radiator drain plug (if applicable), and the water pump for any signs of coolant seepage or drips.
- Observe Over Time: It’s wise to re-check for leaks after a short drive or after the engine has cooled down completely. Coolant can sometimes drip from seals after initial pressure and temperature changes. Look for wet spots or dried coolant residue, which can appear as crystalline deposits.
Using a Cooling System Pressure Tester (Recommended)
For a more thorough leak test, a cooling system pressure tester is invaluable.
- Attach the Tester: Connect the pressure tester to the radiator neck (ensure the engine is cool).
- Pressurize the System: Pump the tester to pressurize the cooling system to the manufacturer’s recommended level (usually indicated on the tester or in your owner’s manual).
- Monitor Pressure: Observe the gauge for a decrease in pressure over a period of 15-30 minutes. A steady loss of pressure indicates a leak somewhere in the system.
- Trace the Leak: With the system still under pressure, you can more easily identify the source of the leak by looking and listening for escaping air or coolant.
Monitoring Coolant Levels
Consistent monitoring of the coolant level is a fundamental aspect of preventative maintenance.
Daily Checks (Initial Period)
For the first few days after a coolant replacement, it is advisable to check the coolant level in the reservoir each morning before starting the engine. This helps to ensure that all residual air has been expelled and that the system is holding its proper fill.
Regular Checks
As part of your regular vehicle maintenance schedule, check the coolant level in the reservoir at least once a month. The level should always be between the “MIN” and “MAX” or “COLD” and “HOT” lines on the reservoir.
Disposal of Old Coolant
Used coolant is a hazardous material and must be disposed of responsibly. Improper disposal can harm the environment and is often illegal.
Recycling Options
- Auto Parts Stores: Many automotive parts stores accept used motor oil and coolant for recycling.
- Service Centers: Your local mechanic or dealership can often accept used coolant for disposal.
- Hazardous Waste Collection Sites: Check with your local municipality for designated hazardous waste collection events or permanent drop-off locations.
Never pour old coolant down storm drains, into sewers, or onto the ground.
Frequency of Coolant Replacement
The optimal frequency for coolant replacement depends on several factors, primarily the type of coolant used and the manufacturer’s recommendations.
Manufacturer’s Recommendations
The most reliable guide for coolant service intervals is your vehicle’s owner’s manual. Manufacturers specify recommended replacement intervals based on extensive testing and the specific cooling system design of their vehicles. Adhering to these recommendations is crucial for maintaining optimal performance and preventing premature wear.
Conventional vs. Extended Life Coolants
- Conventional Coolants: Older vehicles often use conventional coolants (typically green) which require more frequent replacement. These usually need to be changed approximately every 2 years or 30,000 miles, whichever comes first.
- Extended Life Coolants (ELCs): Modern vehicles predominantly use ELCs (often orange, red, or yellow). These coolants have significantly longer service lives, typically ranging from 5 years or 100,000 miles up to 10 years or 150,000 miles for some newer formulations. This extended service life is due to advanced organic acid technology and hybrid formulations that offer superior corrosion protection and longevity.
Factors Influencing Replacement Frequency
While the owner’s manual provides a baseline, certain driving conditions and vehicle status can necessitate more frequent replacement.
Driving Conditions
- Extreme Climates: Vehicles operating in very hot or very cold climates, or those that frequently tow heavy loads, place more stress on the cooling system. This can lead to accelerated degradation of coolant additives.
- Frequent Stop-and-Go Driving: This type of driving can cause the engine to run hotter for longer periods, potentially impacting coolant lifespan.
Coolant Condition
- Visible Contamination or Degradation: As mentioned earlier, if you observe signs of rust, sludge, discoloration, or a foul odor in your coolant, it indicates that the coolant’s protective properties have been compromised. In such cases, it is advisable to replace the coolant sooner rather than later, regardless of the manufacturer’s recommended interval.
- Coolant Leaks: If the cooling system has experienced one or more leaks, it may be necessary to top off the system with new coolant. Ensure you use the correct type and ratio. However, if leaks are frequent, it suggests a more significant issue that needs to be addressed. Replacing the coolant after repairing leaks can also be a good practice to ensure the system is filled with fresh, uncontaminated fluid.
By understanding your vehicle’s cooling system, preparing adequately, following the step-by-step process, and performing regular checks, you can effectively maintain your car’s performance and prevent costly repairs.

Leave a Reply