

One of the easiest ways to create an expensive car problem is to assume that any fluid is better than no fluid.
I have seen car owners add the wrong fluid, overfill a reservoir, use water where a specified fluid belongs, or ignore a warning light because the vehicle still drives normally.
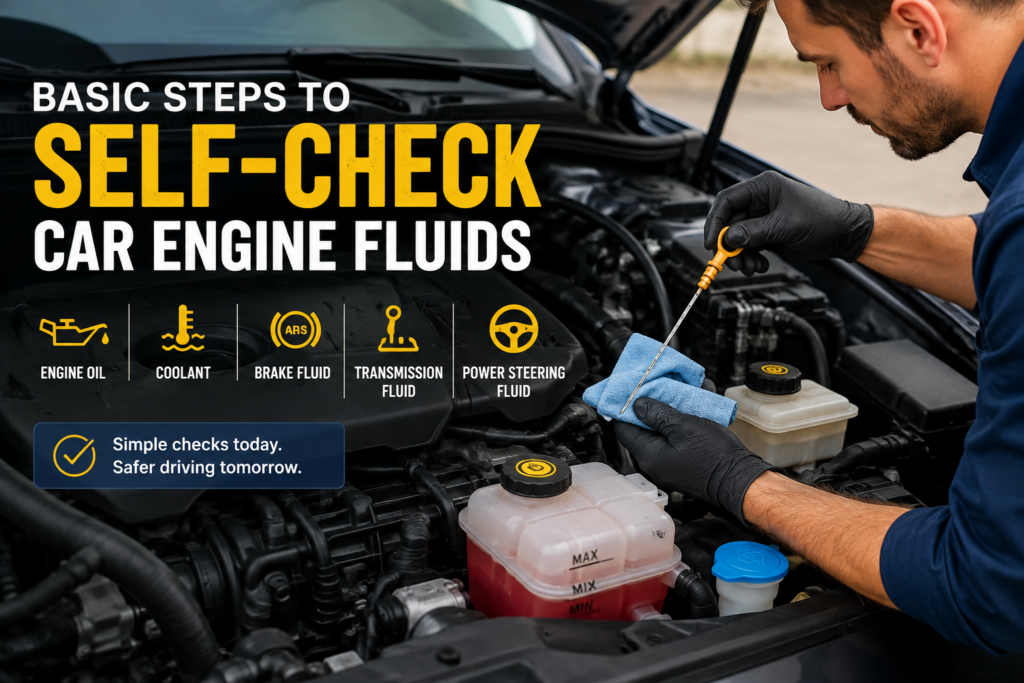
The basic steps to self-check car engine fluids are simple, but knowing what the result means is just as important as checking the level.
Your car’s fluid requirements also depend on the vehicle. A 2026 Mazda owner’s manual, for example, specifies particular inspection procedures for engine oil and identifies the coolant, brake fluid, and washer-fluid reservoirs under the hood.
Toyota similarly includes engine oil, coolant, and brake fluid checks in its routine maintenance guidance.
This guide focuses on what you can safely inspect yourself, how to get a useful reading, what a low or abnormal level can indicate, and when a simple fluid check has become a diagnostic problem.
Important: Always use your vehicle owner’s manual for the exact fluid specification and checking procedure. Vehicle systems differ, particularly transmissions, cooling systems, and hybrid vehicles.
Contents
Before You Check Any Car Fluid
You do not need a workshop full of equipment for basic fluid inspections. A clean rag or paper towel, a flashlight, and the correct fluid specified for your vehicle will handle many owner-level checks.
Before opening the hood:
- Park on a reasonably level surface.
- Switch the vehicle off when the particular inspection requires the engine to be off.
- Allow hot components and pressurized systems to cool when required.
- Keep dirt away from dipsticks, filler openings, and reservoir caps.
- Identify the fluid before adding anything.
- Check the owner’s manual if you are unsure about the procedure.
- Never guess a fluid specification because another car uses it.
- Do not overfill.
AAA also recommends checking fluids on level ground, using fluids that meet the automaker’s specifications, keeping contaminants away from openings, and investigating fluids that require frequent top-ups.
The rule I want you to remember
Identify → Check → Interpret → Act.
Don’t go straight from “the level is low” to “pour something in.”
First, identify what you are looking at. Then check it correctly. Then work out what the result is telling you. Only after that should you decide whether to top it up, monitor it, or have the vehicle inspected.
Which Car Fluids Can You Check Yourself?
Not every fluid system is equally suitable for a DIY inspection.
| Fluid or system | Can you usually check it yourself? | Important point |
|---|---|---|
| Engine oil | Yes, on vehicles with an accessible dipstick | Follow the vehicle’s checking procedure. |
| Engine coolant | Usually | Inspect the reservoir safely when the system is cool. |
| Brake fluid | Yes. | A low level may require brake inspection. |
| Windshield washer fluid | Yes. | Simple owner-level check |
| Power steering fluid | Only if hydraulically assisted | Some vehicles use electric power steering. |
| Transmission fluid | Depends on the vehicle | Some have dipsticks; others require a specific service procedure. |
| Differential/transfer-case fluid | Usually not an underhood check | Access and level-setting procedures vary. |
Modern vehicles can also have additional coolant circuits. Some hybrid vehicles, for example, have separate cooling circuits for the engine and power-control system.
That is why a generic instruction such as “check all your fluids the same way” is not reliable.
1. How to Check Engine Oil Correctly

Engine oil deserves special attention because it lubricates internal engine components, and an incorrect oil level can cause serious problems.
Many vehicles still use a physical dipstick, although some newer vehicles use electronic oil-level monitoring.
Step 1: Find the oil dipstick.
If your vehicle has one, it is normally located in the engine compartment and has a colored or marked handle.
Do not confuse the dipstick with the oil filler cap. The filler cap is where oil is added, while the dipstick is used to measure the level.
Step 2: Check the manufacturer’s procedure.
This is where generic internet advice can become misleading.
Some vehicles specify checking the oil cold. Others specify bringing the engine to operating temperature, switching it off and waiting several minutes before measuring.
For example, a current Mazda owner’s manual instructs owners to warm the engine, switch it off, wait at least five minutes, then remove, clean, reinsert, and recheck the dipstick.
So if you are asking:
Should You Check Car Engine Oil Hot or Cold?
Follow the procedure specified for your vehicle.
There is no universal hot-or-cold rule that applies to every engine.
The important thing is obtaining a consistent reading under the manufacturer’s specified conditions.
Step 3: Park on level ground.
A slope can change the oil’s position in the oil pan and affect the reading.
Step 4: Remove and wipe the dipstick.
Pull the dipstick out and wipe it completely clean with a lint-free rag or paper towel.
Step 5: Reinsert it fully.
Push the dipstick completely back into its tube.
Then remove it again.
Step 6: Read the level.
Look at the markings.
Most dipsticks have a MIN and MAX, or equivalent lower and upper markings.
The oil should normally be within that range.

What if the oil is below MIN?
Use the correct oil specification listed in your owner’s manual and add it carefully.
Do not pour a large amount into the engine simply because the level is low. Add a reasonable amount, allow the oil to settle as required by the vehicle procedure, and recheck.
A current Mazda manual, for example, instructs owners to bring the level back into the marked range while specifically warning against overfilling. (Mazda USA)
What if the oil is above MAX?
Do not assume more oil provides more protection.
Overfilling can also cause engine problems.
If the level is clearly above the specified maximum, have the excess corrected rather than continuing to add or ignoring it.
What if the oil keeps getting low?
This is where the fluid check becomes a diagnostic clue.
If you repeatedly have to add engine oil, ask why.
Possible causes can include:
- An external oil leak
- Oil consumption
- An engine condition that requires further diagnosis
- Incorrect previous filling or servicing
A fluid that repeatedly disappears should not become a permanent top-up routine.
Does dark engine oil automatically mean it needs changing?
Not necessarily.

Oil appearance can change as it circulates through an engine and suspends contaminants. Color alone is not enough to determine whether an oil change is required.
Use the manufacturer’s service interval and the vehicle’s operating conditions rather than judging oil condition solely from its color.
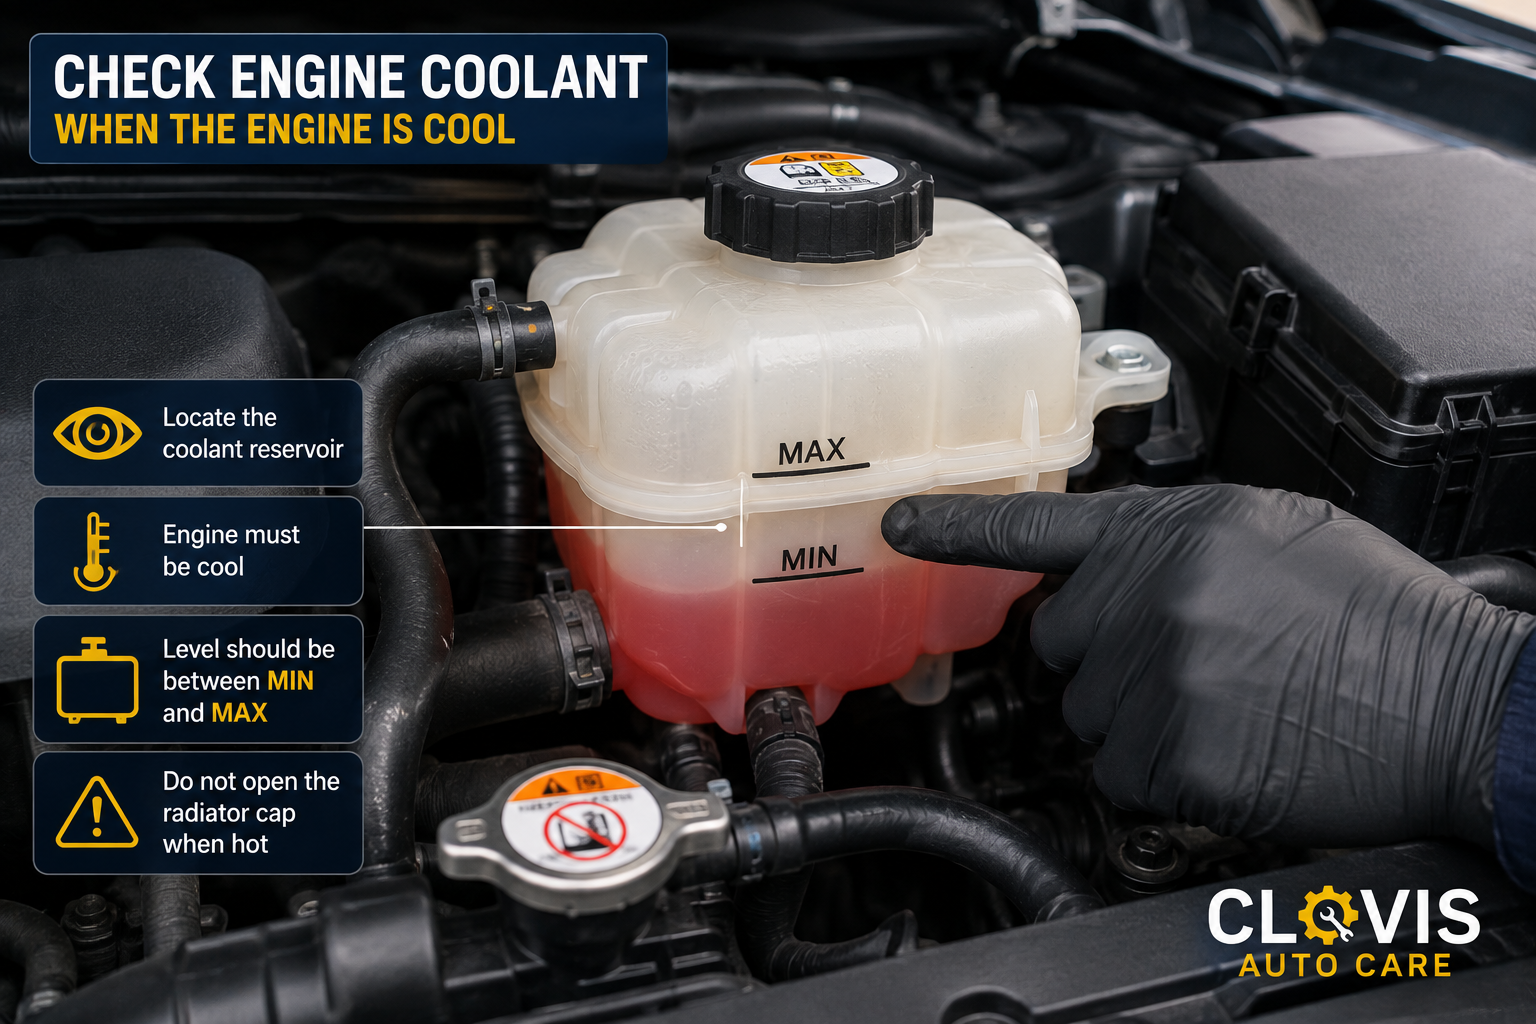
2. How to Check Engine Coolant
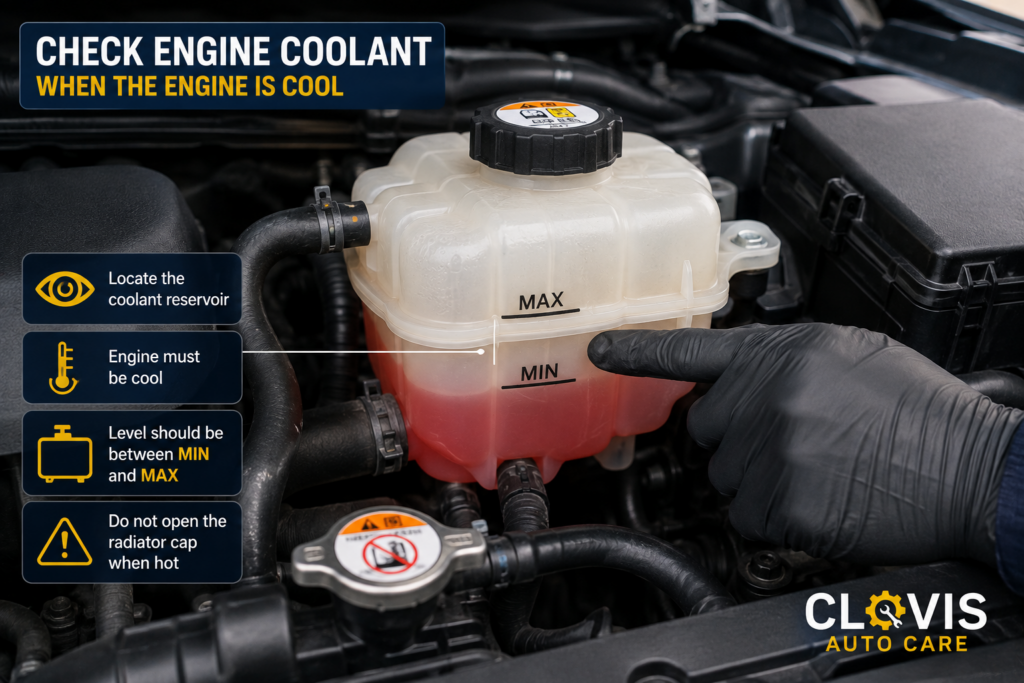
Engine coolant helps control engine temperature and provides protection against freezing and corrosion.
It is also one of the fluids that requires the most caution during a DIY inspection.
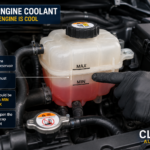
Locate the coolant reservoir
Look for the translucent coolant reservoir and its level markings.
The markings may say:
- MIN / MAX
- LOW / FULL
- COLD / FULL
- Or use another manufacturer-specific designation.
Check coolant when the system is safe.
Do not open a pressurized cooling-system cap on a hot engine.
A current Mazda owner’s manual specifically warns against adding coolant when the engine is hot and instructs owners to inspect the reservoir carefully instead.
The reservoir gives you a way to inspect the level without opening a hot pressurized cooling system.
What does low coolant mean?
If the level is below the specified mark when the engine is cool, use the coolant specified for the vehicle.
Do not automatically assume that all coolants are interchangeable.
Some manufacturers specify particular coolant formulations. Mazda, for example, specifies FL-22 for vehicles marked for that coolant and warns that using another coolant can cause damage to the engine and cooling system.
The important question: why is it low?
A small change may have a straightforward explanation, but repeated coolant loss deserves investigation.
Look for clues such as
- Wet areas around hoses or connections
- Coolant residue
- An empty or repeatedly low reservoir
- Overheating
- A coolant smell
- Visible leakage
If you repeatedly need to add coolant, don’t simply make refilling part of your routine.
A current Mazda manual likewise advises inspection when the reservoir is empty or when coolant needs to be added frequently.
3. How to Check Brake Fluid

Brake fluid is not a fluid to experiment with.
Locate the brake-fluid reservoir and check the level against the markings.
It should generally sit between the specified MIN and MAX lines.
Do not put water in the brake-fluid reservoir.
This is one of the mistakes I specifically want to highlight.
Water is not a substitute for brake fluid.
Brake systems depend on a specified hydraulic fluid. The correct specification is vehicle-dependent, so check the owner’s manual or reservoir specification before adding anything.
Toyota’s current DIY maintenance documentation, for example, specifies particular brake-fluid standards for applicable vehicles rather than treating brake fluid as a generic liquid.
What if brake fluid is low?
Don’t automatically think:
“It’s low, so I’ll just fill it.”
A low brake-fluid level can be associated with brake-lining wear or a leak.
Mazda’s current owner documentation specifically warns that a low brake-fluid level can indicate brake-lining wear or a brake-system leak and recommends inspection.
That makes the correct approach:
Check → investigate the reason → correct the problem.
Not:
Check → refill indefinitely.
If the brake pedal feels abnormal, the brake warning light is illuminated, fluid is leaking, or braking performance has changed, treat that as a safety issue rather than a routine fluid top-up.
4. How to Check Transmission Fluid

This is where I strongly recommend avoiding generic instructions.
Some vehicles have a transmission dipstick.
Some do not.
Some transmissions require the fluid to be at a specific temperature before the level can be checked. Others require access underneath the vehicle and a manufacturer-specific procedure.
AAA also notes that some vehicles have sealed transmissions requiring special procedures. (AAA International Relations)
If your vehicle has a transmission dipstick
Follow the exact procedure in the owner’s manual.
That may specify:
- Engine running or off
- Transmission temperature
- Gear-selector position
- Level ground
- How long to allow the transmission to warm up
- How to read the dipstick
If your vehicle does not have a dipstick
Don’t improvise.
The absence of a dipstick does not mean you should remove a random plug underneath the transmission and see what happens.
The correct level-setting procedure may require specific temperature, access, and equipment.
Use the correct transmission fluid.
This is particularly important with Japanese vehicles because a vehicle being Japanese does not mean every Toyota, Honda, Nissan, Mazda, Subaru, or Mitsubishi uses the same transmission fluid.
Automatic transmission fluid, CVT fluid, and other transmission fluids are not interchangeable simply because they are sold for automotive use.
The specification matters more than the label saying “transmission fluid.”
5. How to Check Power Steering Fluid
First determine whether your vehicle actually has hydraulic power steering.
If it does, there will usually be a power-steering-fluid reservoir or a reservoir integrated with the hydraulic steering system.
Check its markings according to the manufacturer’s procedure.
Some reservoirs have separate hot and cold level markings.
What if you can’t find power steering fluid?
Your vehicle may use electric power steering.
In that case, there may be no hydraulic power-steering reservoir to inspect.
Don’t add fluid to an unrelated reservoir simply because you cannot find one labeled “power steering.”
6. How to Check Windshield Washer Fluid
This is one of the simplest fluid checks.
Locate the washer-fluid reservoir, remove the cap, and check the level if the reservoir is translucent or has an indicator.
If it is low, use appropriate washer fluid.
Washer fluid is different from engine oil, coolant, and brake fluid because its primary job is cleaning the windshield rather than lubricating or hydraulically operating a vehicle system.
In freezing climates, use a washer fluid formulated for the expected temperatures.
7. Fluids You May Not Be Able to Self-Check
The phrase “check your car’s fluids” can make it sound as if every fluid is accessible from under the hood.
It isn’t.
Depending on the vehicle, you may also have:
- Differential fluid
- Transfer-case fluid
- Manual transmission fluid
- Hybrid-system coolant
- Other vehicle-specific fluids
Some require the vehicle to be raised and the fluid level to be set through a service opening.
Others require specialized procedures.
Knowing when not to perform a DIY check is part of proper maintenance.
The 5 Fluid Mistakes I See Car Owners Make Most Often
After years of working around automotive electrical and diagnostic problems, one pattern stands out: people often know that a fluid needs attention but don’t know exactly what belongs in the system.
Here are five mistakes worth avoiding.
1. Using the Wrong Fluid
This is the mistake I see most often.
A fluid being advertised for cars does not make it suitable for every car.
The specification matters.
Engine oil has viscosity and performance requirements. Transmission systems can require specific fluids. Brake systems require specified brake fluid. Coolant formulations can differ.
Always identify the required specification before opening the bottle.
2. Overfilling
Low fluid gets most of the attention, but too much fluid can also create problems.
Don’t assume that if a little is good, more is better.
This is particularly important with engine oil. Manufacturer manuals explicitly warn against overfilling.
3. Using Water Where a Specified Fluid Belongs
Water has legitimate uses in some automotive systems under specific circumstances and manufacturer instructions.
That does not mean you can use water as a substitute for brake fluid.
Before adding anything, identify the system.
4. Choosing a Fluid Simply Because It Is Cheap or Convenient
Price alone doesn’t tell you whether a fluid is appropriate.
What matters is whether the product meets the required specification and is genuine and suitable for the vehicle.
5. Ignoring Dashboard Warning Lights
A warning light changes the situation.
If the vehicle tells you that there is a problem, don’t assume that a quick fluid check clears the warning.
For example, a fluid can be at the correct level while the system still has a fault.
If a warning light appears, diagnose the warning rather than simply adding fluid and continuing to drive.
What I Check First When a Customer Brings Me an Unknown Car
If someone brings me a vehicle and says,
“I don’t know the maintenance history. Can you check it?”
I start with the engine oil.
It is one of the quickest ways to establish whether the vehicle has an obvious fluid-level problem, but I don’t stop at the dipstick.
I want to know:
- Is the level correct?
- Was the vehicle checked under the correct conditions?
- Is there evidence of leakage?
- Has the owner been adding oil frequently?
- Is the level excessively high?
- Does the vehicle have the correct oil specification?
- Is there a warning light that changes the situation?
Then I move through the other applicable systems according to the vehicle.
This is the difference between checking a fluid and using a fluid check as part of an inspection.
How Hot and Cold Temperatures Affect Fluid Checks
Temperature matters more than many car owners realize.
Engine oil changes viscosity with temperature, which is one reason manufacturers can specify particular conditions for checking it.
Coolant has an even more obvious temperature-related job. It helps protect the cooling system against both excessive heat and freezing conditions. AAA notes that coolant provides freeze protection in winter and raises the boiling point in summer. (AAA International Relations)
Extreme temperatures can also expose weaknesses that might otherwise go unnoticed.
That is why you should not invent your own fluid-check procedure based on the weather.
Instead:
Use the vehicle’s specified procedure and fluid specification.
This is especially important when moving between very hot and very cold environments.
Low Fluid Does Not Always Mean “Add More”
This is probably the most important lesson in this article.
A low level can mean different things depending on the system.
| Finding | Don’t automatically assume | Better question |
|---|---|---|
| Low engine oil | “It just needs oil.” | Why has the level fallen? |
| Low coolant | “I’ll keep adding coolant.” | Where is the coolant going? |
| Low brake fluid | “Just fill it.” | Is there brake wear or a leak? |
| Low transmission fluid | “Add ATF” | What fluid and procedure does this transmission require? |
| Low power-steering fluid | “Add steering fluid.” | Does the vehicle even use hydraulic steering? |
This is why I recommend:
Identify → Check → Interpret → Act.
When a Fluid Check Becomes a Diagnostic Problem
You can perform a basic fluid inspection yourself.
What you shouldn’t do is confuse inspection with diagnosis.
Consider getting the vehicle professionally inspected when:
- A fluid repeatedly becomes low.
- You find a visible leak.
- The engine oil is significantly overfilled.
- Coolant repeatedly disappears.
- Brake fluid is unusually low.
- The transmission fluid level cannot be checked using the normal owner procedure.
- A dashboard warning light remains on.
- The vehicle overheats.
- Braking performance changes.
- You aren’t certain which fluid belongs in a reservoir.
A fluid check is useful because it can identify a problem early.
It becomes dangerous when it gives someone false confidence that the vehicle is fine simply because the reservoirs look full.
Quick Car Fluid Self-Check
Use this as a simple reference:
Engine oil
☐ Check using the manufacturer’s procedure
☐ Confirm the level is within the marked range.
☐ Use the correct oil specification.
☐ Don’t overfill
☐ Investigate repeated oil loss
Coolant
☐ Locate the correct reservoir.
☐ Check under safe conditions
☐ Never open a hot pressurized system
☐ Use the specified coolant.
☐ Investigate repeated coolant loss
Brake fluid
☐ Check the reservoir level.
☐ Confirm the correct specification
☐ Never substitute water for brake fluid
☐ Investigate an unusually low level
☐ Take warning lights or braking changes seriously.
Transmission fluid
☐ Determine whether your vehicle has an owner-level check.
☐ Follow the exact temperature and gear-position procedure.
☐ Use the specified transmission fluid.
☐ Don’t improvise a sealed-transmission procedure.
Power steering
☐ Determine whether the vehicle uses hydraulic or electric steering.
☐ Check the correct reservoir if hydraulic.
☐ Use the specified fluid.
Washer fluid
☐ Check the reservoir
☐ Refill with suitable washer fluid
☐ Use a cold-weather formulation where necessary.
conclusion
Checking car fluids is simple enough for many vehicle owners to do themselves, but adding fluid is not the same thing as maintaining the system.
The most important habits are straightforward:
Use the correct fluid.
Use the correct checking procedure.
Don’t overfill.
Don’t substitute random fluids.
Pay attention to warning lights.
And when a fluid keeps disappearing, stop treating the refill as the solution and start looking for the reason.
Your owner’s manual remains the final authority for the fluid specification and vehicle-specific checking procedure. Current manufacturer manuals demonstrate just how much these procedures can vary between vehicles, including engine oil, coolant, and brake fluid checks.
A good fluid check doesn’t just tell you what is low. It tells you what deserves attention next.

Leave a Reply