
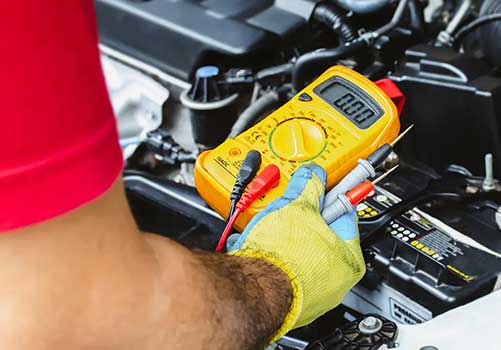


Testing a car battery with a multimeter takes less than five minutes once you know the setup. Set the multimeter to DC voltage on the 20V range, connect the leads to the terminals, and read the display. A healthy battery reads 12.6V or higher with the engine off and 13.5V to 14.7V with the engine running. This guide walks through the full process properly, along with the setup mistakes that quietly throw off the reading for a lot of people.
Why a Digital Multimeter Beats Guesswork
Early in my years doing electrical work, I relied on my five senses to judge whether a battery was okay. The smell of a battery that had overheated or vented gas, its physical appearance, a quick check with a test light, even the color of the built-in indicator eye on top of the battery itself.
That eye shows green for a good battery, dark for low charge, and clear or yellow when it needs replacing, and it’s a genuinely useful quick glance.
But none of those methods give you an actual number, and modern vehicles are built with electronics sensitive enough that “seems fine” isn’t good enough anymore.
A digital multimeter gives real precision, an exact voltage reading rather than an impression, and that precision matters far more on today’s cars than it did on older, simpler electrical systems.
When it comes to choosing one, don’t worry about brand, worry about accuracy and precision. Any digital multimeter that reads consistently and holds a stable value is the right tool for this job.
What You’ll Need Testing a Car Battery
A digital multimeter is all that’s required, the kind most hardware stores or auto parts shops carry is enough for this test.
Digital meters read more precisely than analog ones and have high enough input impedance that they don’t load down or disturb sensitive circuits on modern vehicles, which matters more now than it used to.
Make sure it’s set to measure DC voltage, not AC, since a car’s electrical system runs on direct current and an AC setting will give you a false or zero reading.
Before You Start, a Few Prep Steps That Actually Matter
Rushing this part is the most common reason people get a misleading reading.
- Park on level ground and turn the engine off completely.
- Let the car sit for at least 15 to 30 minutes before testing if it’s just been driven. A battery reads artificially high right after driving due to surface charge, and that reading won’t reflect its true resting state.
- Turn off headlights, AC, and any accessories before testing.
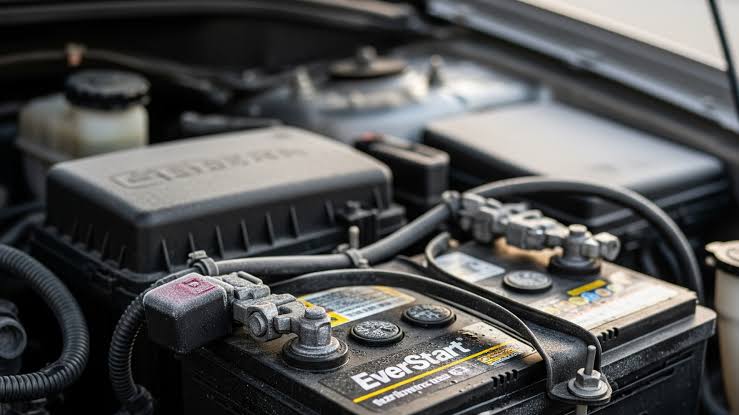
- Check the terminals for corrosion first. A dirty or corroded connection can produce a low or unstable reading even on a perfectly healthy battery.

Step by Step
- Set the digital multimeter to DC voltage, 20V range. This range comfortably covers the 12 to 15V readings you’re looking for.
- Connect the black (negative) lead to the negative terminal first, then the red (positive) lead to the positive terminal. Connecting in this order helps prevent sparking at the terminals. The terminals are usually marked with a plus and minus symbol.
- Read the display. If the number appears with a minus sign in front of it, the leads are reversed, swap them and read again.
- Record the resting voltage. Compare it against the reference numbers below.
- Start the engine and check the running voltage. With the engine running and the alternator charging, the reading should climb to roughly 13.5V to 14.7V. This confirms the charging system is doing its job, not just the battery itself.
What the Readings Mean
- 12.6V or higher, engine off. Fully charged and healthy.
- 12.2V to 12.4V, engine off. Roughly 50 to 75 percent charged.
- Below 12.0V, engine off. Discharged, needs a proper charge.
- 13.5V to 14.7V, engine running. Alternator charging normally.
- Close to 12V with the engine running. Charging system issue, not a battery problem.
- Above roughly 14.5V to 15.0V, engine running. Overcharging, worth investigating.
For the complete breakdown of these numbers and why some sources phrase the ranges slightly differently, see our full guide on what car battery voltage should be.
A Real Fault a Digital Multimeter Caught
A car once came to me with a strange fault. It would start and run fine, but only if the battery terminal were disconnected. The moment the terminal was reconnected, the car would shut off.
Jumpstarting it and running it with the terminal removed, it could run indefinitely, no problem at all.
A digital multimeter is what actually solved this. With the battery disconnected and the car running on the alternator alone, the reading at the alternator was a healthy 13.7V, exactly what you’d expect from a properly charging system.
But the instant the battery terminal was reconnected, the whole system dropped and the car died.
The battery itself had an internal short, and once it was back in the circuit, it was acting like a massive electrical drain, pulling the entire system down instead of storing charge like a normal battery should.
We replaced the battery, and the fault was gone completely.
This is a genuinely advanced use of a digital multimeter, testing the alternator’s actual output with the battery isolated from the circuit, rather than assuming the battery is fine just because the car eventually starts.
It’s also a good example of why chasing a fault by symptom alone (assuming it’s the alternator, the ECU, or a wiring fault because “it dies when running”) can send you in the wrong direction entirely when the actual number on the meter points somewhere completely different.
An Important Limit of This Test
A basic digital multimeter reading confirms charge level, but it doesn’t fully confirm how the battery performs under real starting load. A battery can read a healthy 12.6V at rest and still fail the moment the starter draws several hundred amps.
If your battery seems fine on this basic test but the car still struggles to start, the real answer is testing cranking voltage while the engine actually turns over, which is a more advanced technique than a simple resting check.
Our full guide on testing car battery cranking voltage with a multimeter walks through exactly how to do that safely.
Common Setup Mistakes
- Testing right after driving, which gives an artificially high reading due to surface charge.
- Leaving the multimeter on AC voltage instead of DC, producing a false or zero result.
- Reversing the leads and not noticing the minus sign, leading to confusion about whether the reading is even valid.
- Ignoring corroded terminals, which can make a healthy battery look weak.
- Testing only at rest and assuming that’s the full picture, when a proper diagnosis also checks running voltage and, ideally, cranking voltage under load.
- Testing while a battery charger is still connected, which will give a reading that reflects the charger, not the battery’s actual state.
- Leaving the dial on current or resistance mode instead of voltage, which can damage the meter when connected across a live battery. Always confirm the dial is on DC voltage before the probes touch the terminals.
Conclusion
Testing a car battery with a digital multimeter is a genuinely useful five-minute check once the setup and prep steps are right.
It tells you the charge level and confirms the charging system is working, but it isn’t the whole picture on its own, as the fault above shows, sometimes the real answer only shows up when you test in a way most guides don’t cover.
For a full read on a battery’s real health, especially one that’s starting to act unreliable, pair this basic test with the cranking voltage check and, where needed, a proper load test.








Leave a Reply